使用kubeadm快速部署k8s
一、安装说明
这次安装的是一个单机版的环境,服务器是阿里云的ECS:
- 系统版本 ubuntu18.04;
- 2核CPU,4G内存。
二、准备环境
1. 关闭swap
临时关闭
1 | swapoff -a |
查看swap
1 | free |

永久关闭
需要修改系统文件
1 | vim /etc/fstab |
修改下图位置
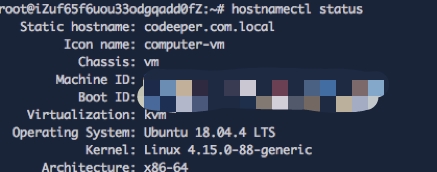
2.修改hostname
1 | hostnamectl set-hostname codeeper.com.local |
三、安装docker
官方安装步骤参考: https://docs.docker.com/engine/install/ubuntu/
配置 repository
更新apt包
1
2
3
4
5
6
7
apt-get update
apt-get install \
apt-transport-https \
ca-certificates \
curl \
gnupg-agent \
software-properties-common添加Docker官方的GPG key
1
curl -fsSL https://download.docker.com/linux/ubuntu/gpg | sudo apt-key add -
添加稳定的repository
1
2
3
4
add-apt-repository \
"deb [arch=amd64] https://download.docker.com/linux/ubuntu \
(lsb_release -cs) \
stable"安装Docker
1
2
apt-get update
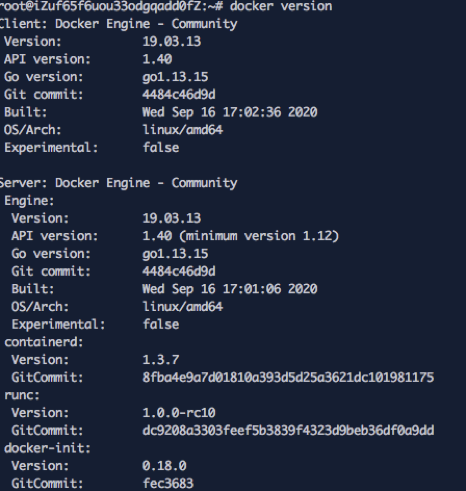
apt-get install docker-ce docker-ce-cli containerd.io检查是否安装成功
1
docker version
设置阿里云镜像加速
1
2
3
4
5
6
7
8
tee ~/daemon.json <<-'EOF'
{
"registry-mirrors": ["https://edmr2cln.mirror.aliyuncs.com"]
}
EOF
systemctl daemon-reload
systemctl restart docker
四、安装kubeadm
官方文档: https://kubernetes.io/docs/setup/production-environment/tools/kubeadm/install-kubeadm/
由于官方使用的是google的package,这里修改成阿里的,添加GPG key
1 | curl -fsSL https://mirrors.aliyun.com/kubernetes/apt/doc/apt-key.gpg | apt-key add - |
添加镜像源
同样的修改为阿里源,加速
1 | cat <<EOF >/etc/apt/sources.list.d/docker-k8s.list |
五、部署 k8s Master 节点
这里使用kubeadm init来一键部署节点,关于init命令的参数说明:
https://kubernetes.io/docs/reference/setup-tools/kubeadm/kubeadm-init/
1 | kubeadm init --image-repository registry.aliyuncs.com/google_containers \ |
- –image-repository:指定镜像的拉取地址。由于默认是从google源获取,这里改成阿里源
- –kubernetes-version:指定kubernetes的版本,这里指定的是1.19的稳定版本
- –pod-network-cidr:给每个pod网络指定ip地址范围。本处设置是为了部署网络插件Calico,满足Calico的部署要求
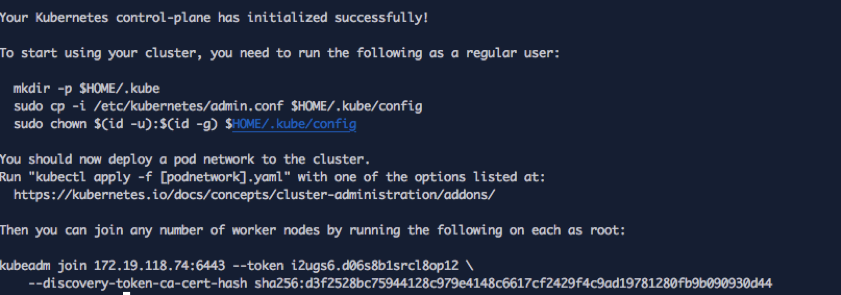
kubeadm会会生成指令:
1 | kubeadm join 172.19.118.74:6443 --token nmwp2h.z2uizkzpoiakihg2 \ |
这个 kubeadm join 命令,就是用来给这个 Master 节点添加更多工作节点(Worker)的命令。这里因为是单节点,暂时用不上,可以找一个地方把这条命令记录下来。
除此之外,kubeadm 还会提示我们第一次使用 Kubernetes 集群所需要的配置命令:
1 | mkdir -p $HOME/.kube |
现在,我们就可以使用 kubectl get 命令来查看当前唯一一个节点的状态了
1 | root@codeeper:~# kubectl get nodes |
可以看到STATUS为NotReady状态,可以用kubectl describe来查看这个节点的状态:
1 | root@codeeper:~# kubectl describe node codeeper.com.local |
通过 kubectl describe 指令的输出,我们可以看到 NodeNotReady 的原因在于,我们尚未部署任何网络插件。
六、部署网络插件 Calico
这里我们部署Calico
地址:https://github.com/projectcalico/calico
安装说明:https://docs.projectcalico.org/getting-started/kubernetes/quickstart
1 | kubectl create -f https://docs.projectcalico.org/manifests/tigera-operator.yaml |
查看安装状态
1 | root@codeeper:~# watch kubectl get pods -n calico-system |
看到所有pod的状态都是Running,说明安装成功
至此,Kubernetes 的 Master 节点就部署完成了。这里我们只需要一个单节点的 Kubernetes,现在就可以使用了。
但是,在默认情况下,Kubernetes 的 Master 节点是不能运行用户 Pod 的,所以还需要额外做一个小操作。
七、通过 Taint/Toleration 调整 Master 执行 Pod 的策略
默认情况下 Master 节点是不允许运行用户 Pod 的。
一旦某个节点被加上了一个 Taint,即被“打上了污点”,那么所有 Pod 就都不能在这个节点上运行。
除非,有个别的 Pod 声明自己能“容忍”这个“污点”,即声明了 Toleration,它才可以在这个节点上运行。
查看 Taint
1 | root@codeeper:~# kubectl describe node | grep Taints |
一个单节点的 Kubernetes,最好是删除这个 Taint :
1 | kubectl taint nodes --all node-role.kubernetes.io/master- |
在上面的命令中,“node-role.kubernetes.io/master”这个键后面加上了一个短横线“-”,这个格式就意味着移除所有以“node-role.kubernetes.io/master”为键的 Taint。
继续查看 Taint
1 | root@codeeper:~# kubectl describe node | grep Taints |
这样一个基本完整的单节点Kubernete就部署完毕了,后面可以自行加上可视化插件Dashboard和持久化存储插件。